Moodle Lecture
The «Lecture» activity in Moodle uses what is known as feedback.
Let’s take a closer look at what a lecture with feedback involves.
In a lecture, you can create multiple interconnected HTML pages containing specific content. After studying a page, the student doesn’t necessarily move to the next content page but instead goes to a quiz page. Depending on their answer, the student can either proceed to the next page or go back to review the previous material. Adding a quiz at the end of each page is optional, as is restricting access to the next material if the quiz is not passed successfully—these options can be configured in the settings.
Now let’s go over the main lecture settings.
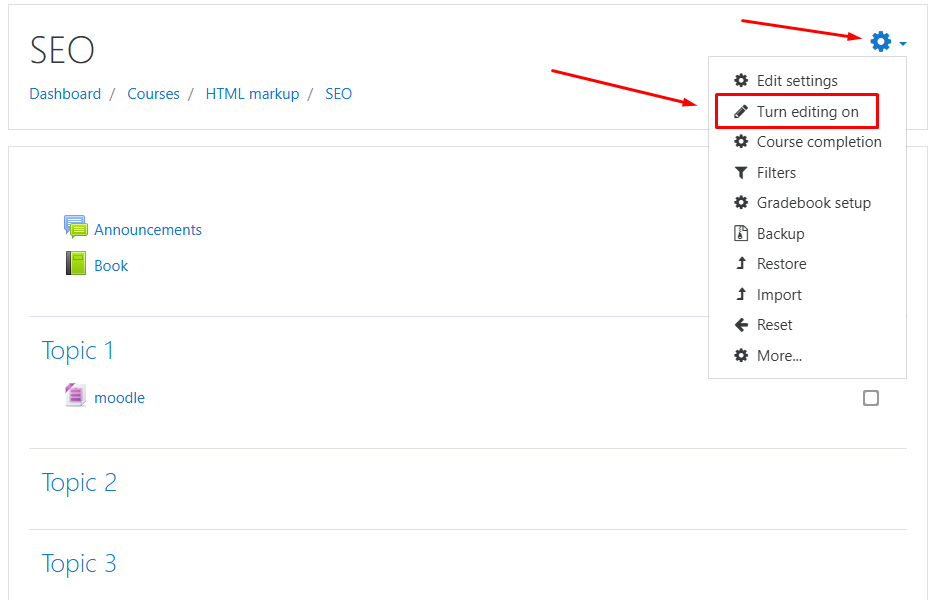
To begin creating and editing a lecture, you must be logged in as an administrator and enable «Editing mode».
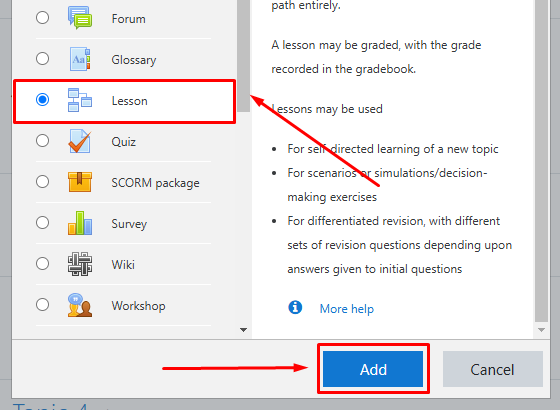
Click «Add an activity or resource».
Select the «Lesson» activity and click «Add».
In the «Name» field, specify the title of the lecture.
You can set a time limit for completing the lecture in minutes. To do this, enable the «Time limit» option in the «Availability» section.
You can also limit the availability of the lecture by setting start and end dates for when it will be accessible to users.
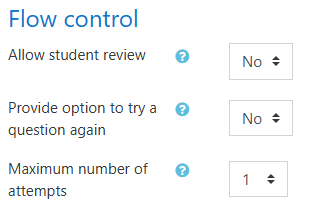
In the «Flow control» section, you can configure permissions for retaking the lecture, retrying questions, and setting the maximum number of attempts.
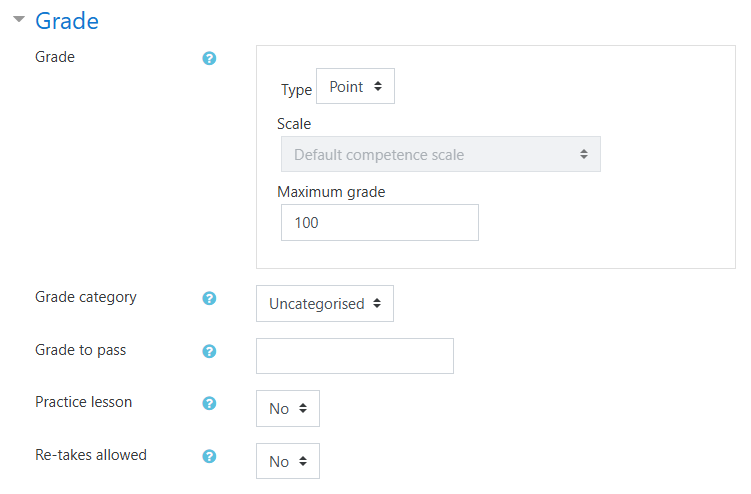
In the «Grade» section, you can choose the type: points or scale. If you set «Practice lecture» to «Yes», no grades will be assigned for completing the lecture:
Once you’ve completed the settings, click «Save and Display».


